Back in December, I collaborated with another brand here in Sweden to develop a lip balm infused with lots of wildcrafted plants from Swedish nature. Our goal was to harness the power of the Swedish forest into a little tube that people can carry around in their pockets. It was super fun!
While I cannot share the exact formula, I will be sharing a very similar one today, utilizing two of the easiest plants to wildcraft right now here in Sweden – Pine and Rosehips. Both are full of nourishing vitamins, antioxidants, bioflavonoids and other compounds that make them healing and protective.
These lip balms are fabulous. I now keep one on me at all times now for several reasons:
- to soothe our winter chapped lips, of course
- to soothe wind-burned cheeks
- to soothe the skin under our noses, which are constantly being wiped
- to soothe the itchy eczema flare-ups that my youngest son has been getting on his forehead and wrists lately
Totally natural and simple, this lip balm is free of any toxins or essential oils, ensuring they are safe for all ages and skin types.
One thing I discovered while developing lip balms is that everyone has their own idea about what the texture of a lip balm should feel like. Some like it more soft and silky, quickly melting into the skin. Others prefer it to be more solid and waxy.
The great thing about making your own lip balm is that you get to create a texture that suits you best. You also get to choose your favorite oils and butters. And while infusing plants into your lip balm is totally optional, if it’s something you’d like to do, then you can create your very own blend (see tips below for some plants you can use other than pine and rosehip)!

The Wildcrafting – And Plant Extracts
It was early December here when we began this project, which meant that we were limited to what nature offers us in the deep mid-winter months. I have a cabinet full of dried plants collected during other parts of the year, but this client wanted to be involved in the wildcrafting process. It was part product development, part workshop!
We spent a few days out in nature together searching, sampling, talking and testing. Along with Rosehips and Pine, we worked with a few other things we could find in our freezing climate, like Dandelion root, Birch buds, Juniper berries, Chickweed. More to say on all of these, but for the sake of this post, I’ll focus on Pine and Rosehip.


Rosehips, or the fruit of the Rose, are fighters. They can stay plump and vividly red even after severe frosts, providing much-needed nutrients to various animals throughout the winter. So always give thanks and never strip a bush, or even a branch, of all its hips. Avoid any hips that have gone black, have a lot of black spots or holes, etc. If it’s mid-winter, the hips will probably be quite soft, which is okay. You will need to dry them out anyway before infusing them into oil.
As for Pine, go to your favorite wild place and find a healthy looking Pine tree. I like to sniff around a bit. And taste test. True story! It may sound strange, but I prefer plants that are really active. Like all of us, trees also have their more dormant years and seasons. Which is why I always say to use all of your senses when choosing evergreen needles. Not only sight, but also taste, touch, smell.
To harvest, just snap off the tips of a branch or two. Give thanks to the Pine.


If you don’t know how to infuse the properties of plants into oil, it’s very simple! Check this older post – Make Your Own Infused Oils – for everything you need to know.
Basically, you will prepare your chosen plant material, cover it in oil, allow it to infuse (using gentle heat in the quick method, or allowing time to do all of the work in the slow method), and then strain out the plant material, leaving you with an infused oil.
As for the plant material, you can use dried flowers like Calendula, Lavender, Yarrow, Meadowsweet, Chamomile, Pansy. You can use dried berries like Elder, Lingon or Juniper. Or green leaves like Plantain, Stinging Nettles, Blackberry leaf, Spruce needles, etc.
As for which oils to use, this is really up to you. I always choose oils that are low in polyunsaturated fats (PUFA), and you can read why in this post, Low-PUFA Skincare. And here is a list of my favorite skincare oils. But feel free to use whichever cosmetic oils you prefer. It’s your lip balm, baby.
Once we had our infused oils, we moved onto the next phase of product development.

Finding the Right Ratio
A basic lip balm recipe is 1 part butter, 1 part oil, 1 part beeswax. This is what I’ve always heard anyhow. But I personally don’t think this yields the greatest lip balm. I have tweaked throughout the years, finally settling on a ratio that looks more like 1 part beeswax, 2 parts butter, 2 parts oil. And for the butter portion, I find that a combination of cocoa butter and shea butter results in a more luxurious texture. If you aren’t sure how to work in “parts”, don’t worry, I will give you the exact measurements below.
There are 2 major factors to consider when developing a lip balm ratio:
• Your climate. It is cold and dry for most of the year here in Sweden, especially in mid-winter. If I sent this same lip balm to Australia where it is a balmy 33º C (91º F), I’m afraid that this lip balm would be a melting mess. If you’re in a warm climate, you may need to increase your proportions of wax and hard butter (like cocoa butter). If you’re in a cooler, dryer climate, then you can get by with less wax and more oil.
• Your preferences. I mentioned this above, but if you’re someone who prefers a softer lip balm that glides on smoothly and melts quickly into your lips, then you’ll want to use a slightly higher proportion of oil and soft butter (like shea butter). And vice versa. If you’re after a more solid, waxy feel, then you’ll want to use a slightly higher proportion of beeswax and hard butter (like cocoa butter).
I emphasize the word slightly because even an extra gram or two of oil can make a big difference, so go easy if you’re experimenting. And remember the old adage: you can always add more but you can’t take any away.
Also, if you choose to infuse your oil with plant properties, then this could also affect the final result. Some plants create more density and weight in the oil. Not a huge factor, but something to be aware of.
With the formula I’ll share below, along with the thoughts I’ve shared above, I’m confident that you can find a lip balm formula that you absolutely love!

Packaging
Packaging isn’t something I usually mention on these make your own posts, but I feel it’s important to note here, because lip balms are usually packaged in bulky, single-use plastic tubes that cannot be recycled. Yes, they are convenient, but they are not great for your body’s health or for the environment’s.
Thankfully there are several solutions these days. The simplest is to pour your lip balm into little glass jars or metal pots. Couldn’t be easier, and it’s honestly just as convenient.
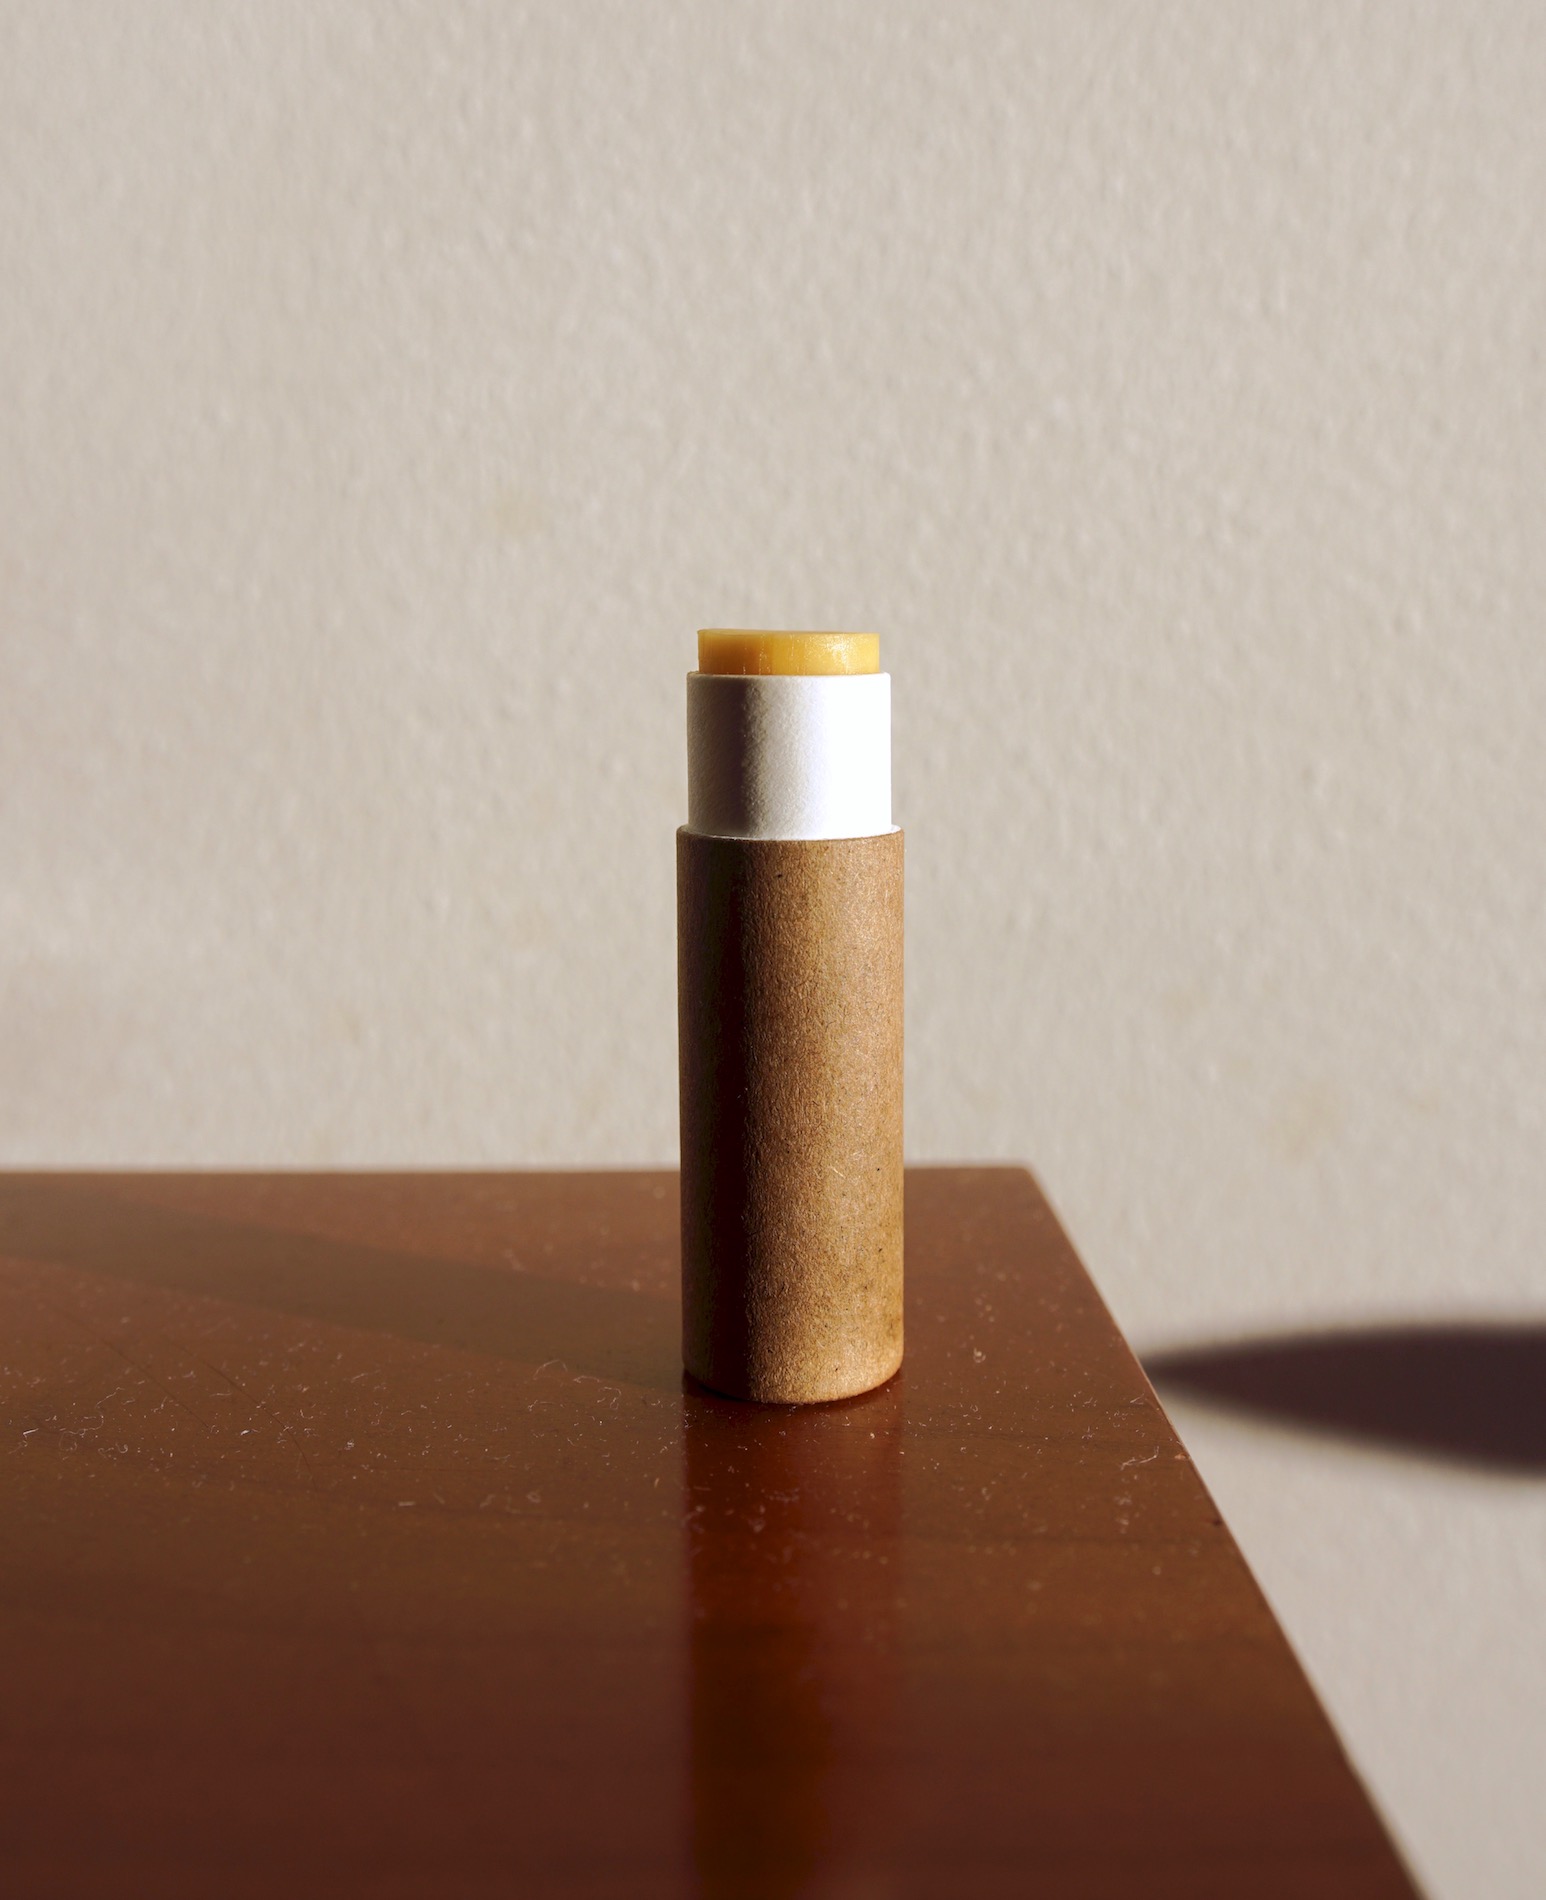
If you can’t give up the tube containers, however, then choose paper versions in lieu of plastic. Cardboard lip balm tubes are more and more readily available these days. Sometimes you can even find them at craft stores. Bonus: they’re usually less expensive too.
The paper lip balm tubes I use are biodegradable and made from recycled materials. Very sturdy too, so don’t be worried about that. And super easy to use. Instead of the plastic wheel, you simply push the lip balm stick up with your finger on the bottom of the tube. I’m really happy with them!
Okay I think we’re ready to start making some lip balm now, yeah? It’s super straightforward from here.


Lip Balm Infused with Wild Rosehips and Forest Pine
This is the formula I used to make our latest batch of lip balms. But please read the notes above to learn which factors may affect your ratio and end result.
You’ll need –
- 12 grams beeswax
- 15 grams cocoa butter
- 10 grams shea butter
- 25 grams infused oil (I used 12 grams of pine-infused extra virgin olive oil + 13 grams of rosehip-infused jojoba oil)
- Paper lip balm tubes or other small containers of choice
Goes like this –
In a bain-marie (double boiler, or water bath), melt the beeswax, cocoa butter and shea butter until completely liquid. Stir in the infused oils. Pour into lip balm tubes or other small containers and set aside for 24 hours to cool and cure. I keep the lids on during the cooling phase to ensure that no dust or other airborne particles get trapped in there.
That’s it, y’all.
Enjoy your own handcrafted, wildcrafted lip balm!
Take good care and see you soon.
xx Beth